Tag Archives: Cranberry

Fruity Flapjack

19 Jan

Flapjack is one of the few biscuit things that does not get as much credit as I feel it deserves. Admittedly I had to ‘rediscover’ flapjack after years of not having or making any, and to be honest I still do not make it as much as I should! This flapjack has lots of fruit in, well more than normal as I for one am not keen on nuts and seeds, but it is still that amazing chewy snack from childhood 😀

Flapjack4

Ingredients

  • 135g Butter
  • 28g Honey
  • 68g Golden Syrup
  • 68g Demerara Sugar
  • 100g Sultanas
  • 150g Chopped Dried Apricots
  • 100g Dried Cranberries
  • 210g Rolled Oats
  • Estimated time: 40 minutes

Directions:

Flapjack is a brilliant thing, it’s so easy to make with or without children helping! Weigh the butter, sugar, syrup and honey into a saucepan (or you can melt them in a microwave, but be careful not to let it burn!) and gently heat it until the sugar has dissolved and it’s all melted together.

Flapjack

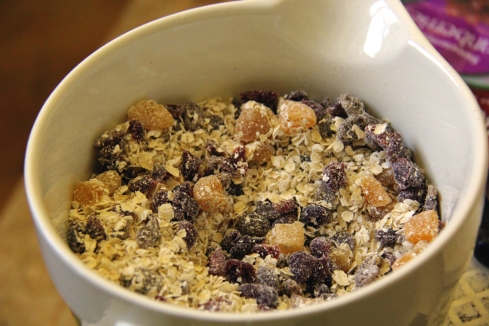
While they are melting in the pan you can way out the dried apricots. If you’ve got chopped ones then brilliant, turns out that we didn’t so I had to sit down and chop them all up! I’ve found that in half and then into three is a good size chunk to have in the flapjack as it’s not too small so you don’t get the flavour but it’s also not so big that you don’t get anything else. Once they’re chopped you can put them all into a large bowl along with the sultanas, dried cranberries and the oats. All of the fruit that I’ve used you can swap and change around to suit your taste, especially sultanas, I know quite a few people that I work with who have a rather big hatred of dried fruit!!

Flapjack1

Now that your dry ingredients are all weighed into a bowl, and you butter is all melted you can pour the syrup into the dry ingredients and carefully stir in. This shouldn’t take long as it is a small amount of flapjack, you just want to make sure that everything is covered in the syrup so that it sticks together when cooked.

Flapjacksyrup

When that’s all mixed well you need to line a baking tray with some grease-proof paper, once again if you measure it bigger than the tray and leave the edges sticking up then it will make it so much easier to take it out of the tin once cooked and cooled. Spoon the flapjack into the tray and press to the edges, you can either flatten it with a cold metal spoon or just the palm of your hand, either work as you only want to press it together to try and get a flat surface. This is more for looks than anything else, although it does kind of help it stick together, just don’t press it too far down or it will be a strange burnt biscuit!!
Bake in the oven at 180 degrees for 15-20 minutes, when it’s cooked it should be a nice golden colour and it should feel like it has a slight crust on top, but still soft underneath. This is important because the flapjack will harden up when it cools down so you don’t want to ever cook it and end up with tough snacks!

Flapjack3

As soon as its cooked take it out of the oven and leave it to cool on the side, you can take it out of the tin if you want but for flapjack it really doesn’t matter. Once it has cooled cut it into your preferred portions. I got 5 across and 3 down, although the corners were tiny and crumbled…but they were so tasty.

Flapjack4

There you have it, some incredibly easy and tasty flapjacks that everyone will love and want to make, however you like them. An almost healthy treat for the family!!

Cranberry & Orange Cake

12 Jan

Hopefully my family are not the only ones who are left with flaming cranberries to try and use up from Christmas, and hopefully you aren’t all fed up of eating them… It’s only through going back to work and facing the exact same problem that I have been able to find something to do with them! This is an easy cake and can be adapted to each person’s taste and preference 😀

CranberryandOrangeCake4

Ingredients:

  • 225g Butter
  • 225g Caster Sugar
  • 4 Eggs
  • 1 Egg yolk (keep the white)
  • 75ml Orange Juice
  • 2 Zested Oranges
  • 110-200g Fresh Cranberries
  • 225g Self-raising Flour
  • 1tsp Baking Powder
  • 100g Fresh Cranberries

Icing:

  • 130g Butter
  • 130g Icing Sugar
  • 1 Zested Orange
  • 1tbsp Orange Juice
  • Estimated time: 65 minutes


Directions:

As usual, this cake is based on a normal sponge recipe so you can weigh the butter and sugar into the bowl together and cream them using a wooden spoon until light and fluffy. Once fluffy start to add the eggs and yolk one at a time so you can mix them in well between each addition. When they are all mixed in you need to add in the orange juice, due to the temperature of the orange juice it is pretty definite that the mix will curdle, mine looked awful! But don’t ever let this put you off or scare you, especially if it’s the first cake you’ve ever made (I remember teaching my friend to make a sponge cake, she was so sure that she had messed it up just from adding the eggs!) as soon as the flour is all mixed in it’ll be fine!

CranberryandOrangeCake

Now the cranberries, this part is entirely up to you (you don’t even have to add them if you don’t want to!), my family quite like the tartness of the cranberries, especially in this cake as it stops the cake from being so sickly sweet so I went for the full 200g. Unfortunately though, whatever amount you choose they do have to be roughly chopped so no one gets a whole cranberry at one time! Once chopped you can either put them straight in the bowl, or mix them with the flour first if that works for you. Fold the flour and cranberries into the mix carefully, making sure you don’t knock out the air. At this stage you can also mix through the orange zest.

CranberryandOrangeCake1

Now for this cake I have chosen to use a loose bottomed tin rather than making a sandwich cake or a loaf. Although this is partly because loaf cakes do not last long in my house, usually disappearing while I’m at work! If using a loaf tin make sure the sides are well greased and that you have lined the bottom with greaseproof, same with the separate tins. For a loose bottomed tin it is so much easier to cut a square of greaseproof paper bigger than the bottom ‘plate’ of the tin, place the paper over it and then placing the rest of the tin on top carefully close it so that the paper is trapped lining the bottom of the tine nicely, make sure you don’t forget to grease the sides!

CranberryandOrangeCake2

Bake this cake at 180 degrees for 30-40 minutes, if using a loaf tin check it at 35 minutes as it might need longer than normal, whereas if you are making a sandwich cake I would check at 25 minutes as although this cake is quite dark on top, dark and burnt is a huge difference and so annoying to find! Hopefully when cooked your cake will smell amazing and using a skewer pierce the middle as it should come out completely clean. Leave it on a cooling rack to cool down. For loose bottomed tin users, just remove the sides of the tin. For sandwich and loaf tin users leave them for about 10-15 minutes until they are cool enough to hold the tins, using a palette knife check they aren’t stuck by running it around the edge of the tins and then carefully turn them out onto the rack and allow to cool completely. If you don’t have a palette knife then a normal ‘eating’ knife will be fine as long as you are careful and stick to the edges as of course these knifes will not bend!

While the cake/cakes are cooling time to sort the decorations!!! Firstly you need to get the 100g of cranberries which we are going to turn into frosted cranberries. So you’ll need a normal bowl with some granulated sugar in, you don’t want to have too much as it will get egg white in so can’t really be used for tea afterwards! Place a handful of the cranberries into the egg white and mix them around a bit with your finger, pick one berry up and let any excess egg drip off then drop it into the sugar. Using your other hand (always important to keep one clean hand!) cover the berry with sugar, once covered carefully lift it out and place it onto a flat surface. This is slightly tricksey as the sugar wipes off easily before it all dries, now you just have to repeat until you have enough cranberries to decorate the cake, if you don’t use all the cranberries it doesn’t matter, I only said 100g as a guideline. If you find that some of the sugar starts to dissolve into the egg white don’t worry, just roll them into the sugar again as this will help it dry out.

CranberryandOrangeCake3

For the icing, weigh the butter and sugar into the same bowl and beat together until there are no large lumps of butter. At this stage add the orange juice and carry on mixing until there are no lumps of butter in the icing, the more you beat the icing the lighter it will be in colour and texture. Once it’s nice and smooth you can finally mix in the orange zest and start to ice your cake! I just used a palette knife to spread it and then tried to scatter the berries on top…sadly I am not that good at randomly scattering things so halfway through I tried to organise them, didn’t really work, but it still looks tasty!

CranberryandOrangeCake4

There you have it a very, very tasty way to get rid of any leftover cranberries! A way that hopefully will make your family, or house mates very happy!!